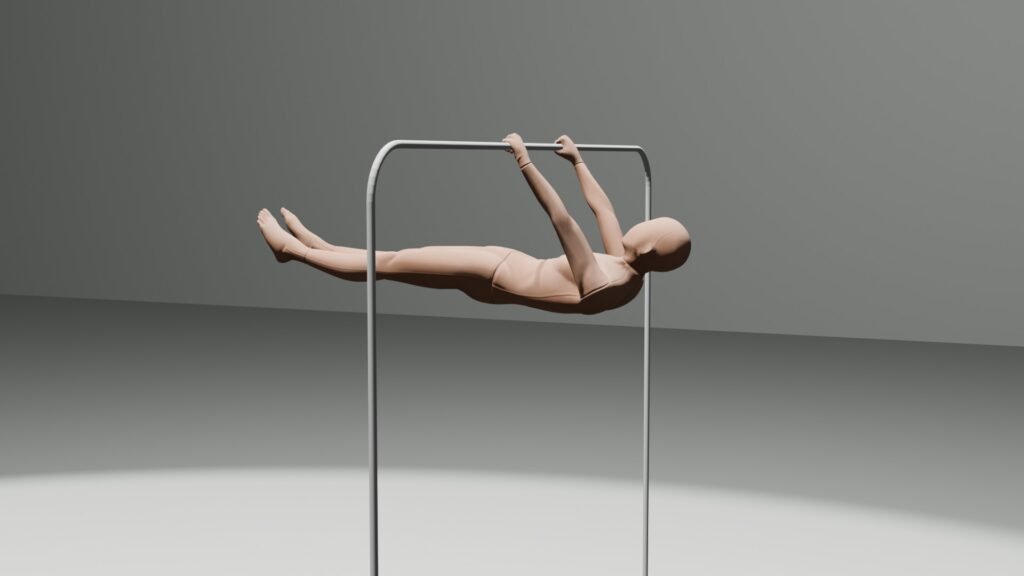
What Is The Front Lever?
The Front Lever is one of the most iconic static holds in calisthenics that makes you look like you are levitating. It involves hanging from a bar or rings and holding your entire body horizontal to the ground, face up, supported only by your grip and pulling/hanging strength.
While it looks like an ab exercise, the front lever is actually a massive test of straight-arm pulling and hanging strength. It primarily targets lats, rear delts, and the entire core. To hold this cool looking static position, your body has to fight a huge amount of leverage, making it much harder than it looks. Mastering the front lever proves you have elite-level control over your posterior chain and upper body.
Table of Contents
Requirements For Front Lever
Before you start training for the full front lever, you need a solid foundation. Attempting this move without the proper strength, technique and tendon conditioning can lead to elbow or shoulder strain. You should ideally be able to:
- Pull-Ups: 10-15 strict, clean reps.
- Inverted Rows: 15 reps with your feet elevated.
- Passive Hang: 60 seconds to ensure grip and shoulder health.
- Hollow Body Hold: 60 seconds with perfect form.
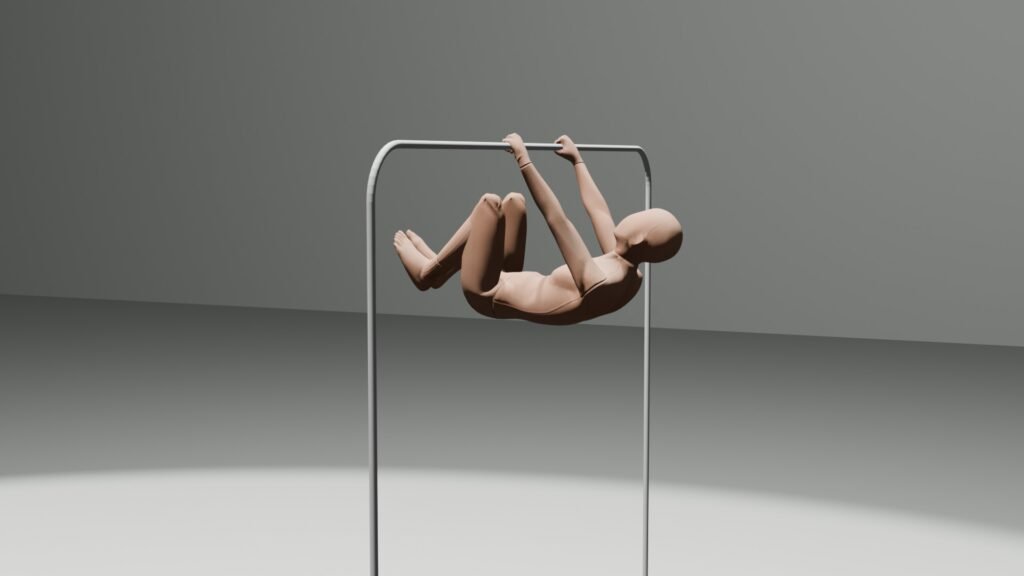
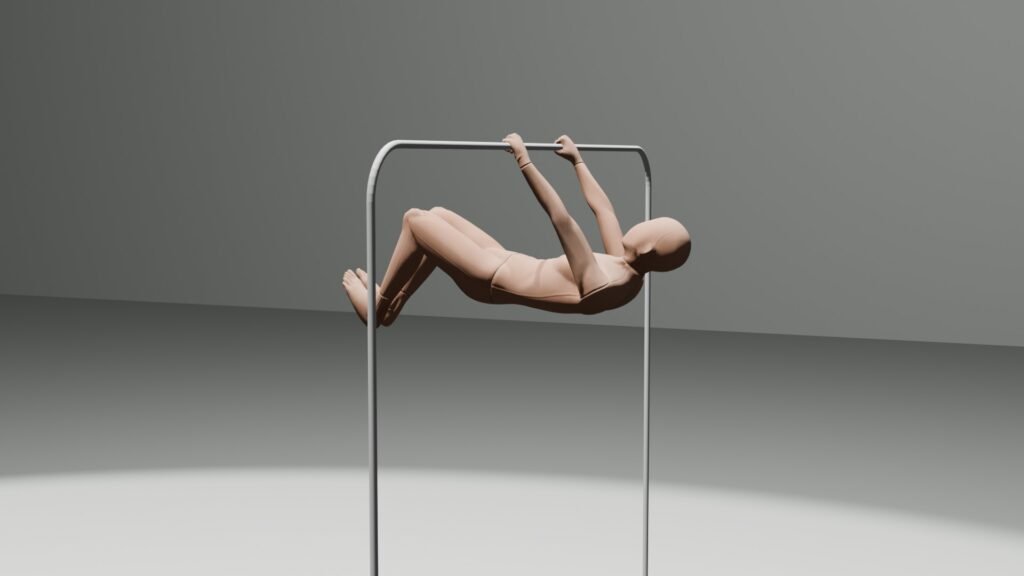
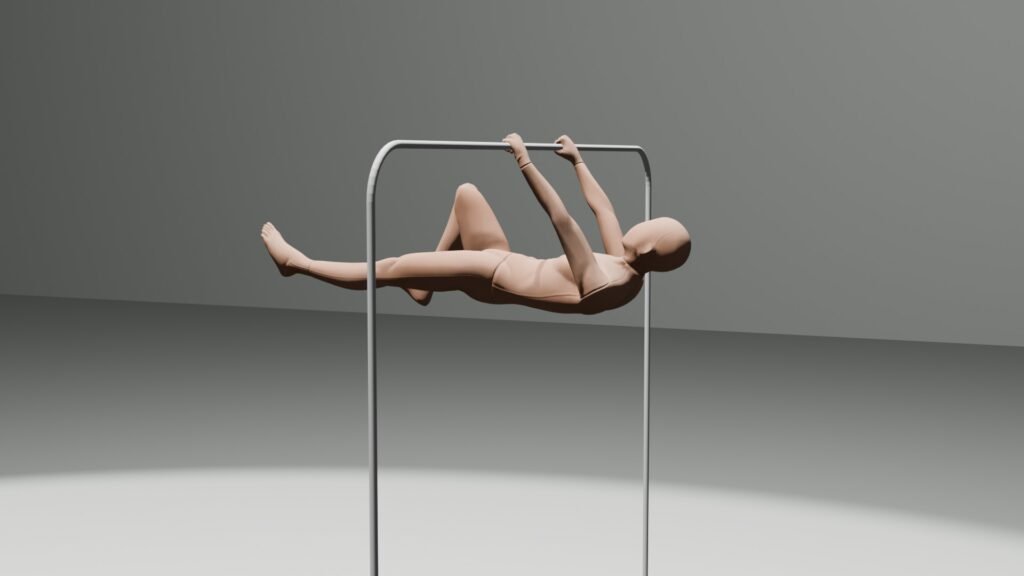
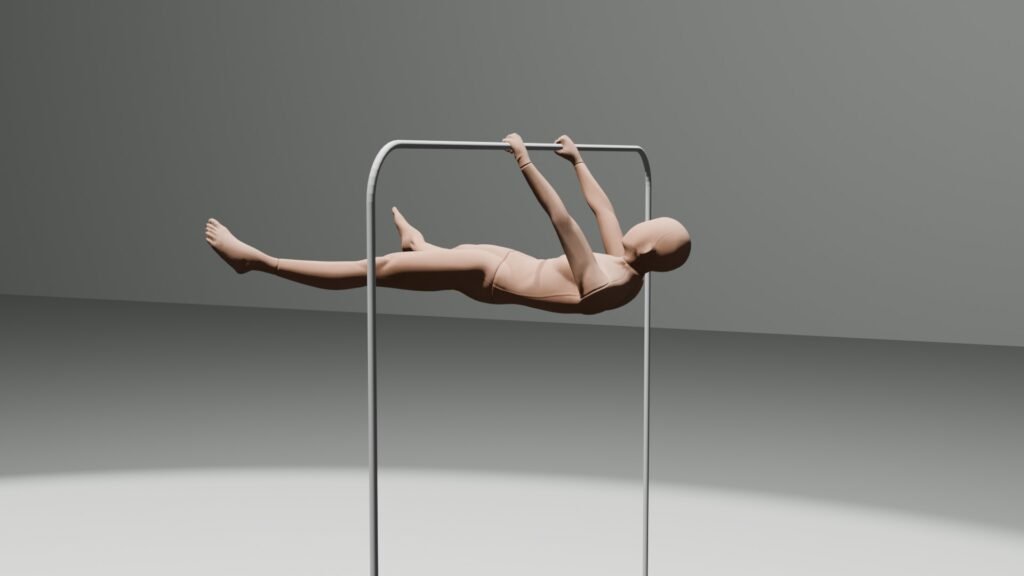
How To Do The Front Lever
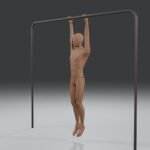
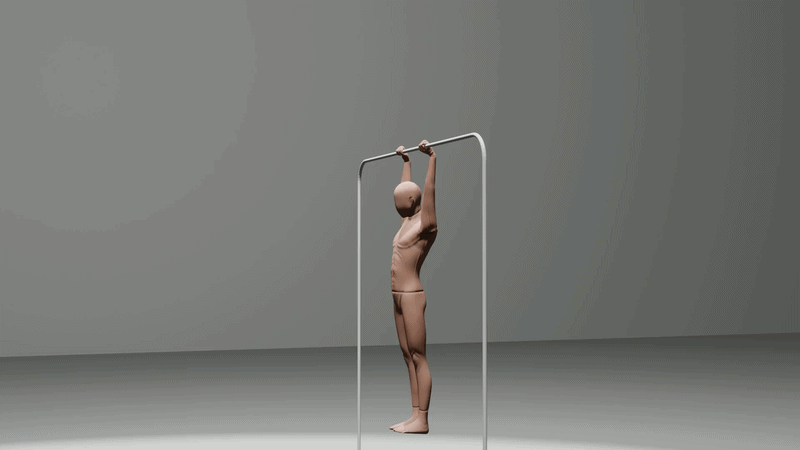
Start by hanging from the bar with a shoulder-width grip. You can use an overhand grip (palms away) or a false grip on rings.
While hanging, the most important cue is scapular depression and retraction. You must pull your shoulder blades down and back, as if you are trying to “break the bar” in half. This engages your lats, which are the primary muscles holding you up.
From the hang, pull your body up until it is horizontal. Keep your arms perfectly straight. If your elbows bend even a little, the tension shifts away from your lats and puts unnecessary stress on your joints.
Controlled and clean movement is the key. Your body should be a straight line from your head to your toes. Squeeze your glutes and quads hard. This prevents your hips from sagging, which is the most common form mistake. Think about pushing the bar down toward your hips rather than just hanging from it.
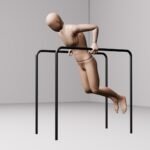
The Front Lever Progression Path
Because the leverage of a full front lever is so extreme, almost everyone must start with shorter lever positions. Move to the next step only when you can hold the current one for 15–20 seconds with perfect form.
1. Tuck Front Lever
Bring your knees tightly into your chest and tuck your head back slightly. This is the shortest the lever can be, making it the easiest starting point.
2. Advanced Tuck Front Lever
Once the tuck is easy, push your knees away from your chest until your back is flat and your thighs are at a 90-degree angle to your torso. This increases the load on your lats significantly.
3. Single Leg Front Lever
From the tuck position, extend one leg straight out while keeping the other tucked in. Make sure to switch legs each set to avoid imbalances.
4. Straddle Front Lever
Extend both legs out but spread them wide apart. Spreading your legs moves the center of mass closer to the bar, making it easier than the full version but harder than the single leg.
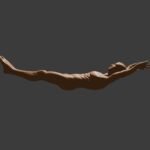
5. Full Front Lever
Slowly bring your legs together. Squeeze your inner thighs, point your toes, and hold the static position. You have officially reached an impressive level of strength and control!
Benefits of Front Lever Training
So, why should you even learn to do the front lever? While it’s impressive skill and the cool factor is high, the functional benefits of training for a front lever are even higher. It builds a level of isometric pulling strength that carries over to almost every other calisthenic and bodyweight training skills that requires pulling and holding strength.
Doing front lever progressions as part of your routine is highly beneficial for fixing rounded shoulders because it forces the back muscles into a position of extreme retraction. It also develops strong core stability, as your abs have to work overtime to keep your legs from falling.
Front levers are the ultimate expression of upper body tension. They will unlock the strength needed for advanced moves like the human flag. Once you can hold a full lever, you’ll find that regular pull-ups feel like you’re lifting a feather.
The Grip – Overhand vs. Underhand
Overhand Grip
When choosing your grip for the Front Lever, you are essentially choosing which muscle groups will act as the primary anchors for your body weight. The most common approach is the overhand grip (pull up grip), where your palms face away from you.
Overhand grip is widely considered the standard for a reason: it forces the lats and the muscles of the upper back to shoulder the entire load. Because this grip puts the biceps in a mechanically disadvantaged position, you cannot “cheat” the movement using arm strength. This makes the overhand grip the superior choice for building a thick, powerful back and developing the scapular retraction necessary for elite-level calisthenics. Most athletes find this grip to be the most sustainable for long-term training because it aligns the shoulders in a way that minimizes joint impingement. Stick to the overhand grip for 90% of your training.
Back-Dominant Strength: This grip minimizes bicep assistance, forcing your lats and traps to do all the work, which is ideal for building upper back thickness and a wider “V-taper” physique.
Safer Joint Alignment: It is generally the kindest grip for the elbows and biceps, making it the best choice for high-volume training and long-term progression without risking tendonitis.
Standard Competition Form: Because it is the most difficult and “pure” version of the move, the overhand grip is the universal standard used in calisthenics competitions and strict form checks.
Underhand Grip
The underhand grip (chin up grip), presents a completely different challenge. By turning your palms toward your face, you suddenly recruit the biceps to help the lats maintain the horizontal line. Many find that they can actually hold a more difficult progression, such as a straddle or full lever, longer with this grip because of the added structural support from the arms. However, this comes with a significant trade-off in safety.
The underhand position places an immense amount of eccentric tension directly on the distal bicep tendon. If you have not spent months or years conditioning your elbows with movements like the german hang, attempting a high-level front lever with an underhand grip can lead to serious tendon strains or even a rupture. It is a powerful variation, but it requires a “bulletproof” foundation before it should be integrated into a regular routine.
Increased Arm Leverage: Turning your palms toward you recruits the biceps to help “lock” the position, which can often make holding a difficult horizontal progression feel slightly easier or more stable.
High Injury Risk: This position places extreme eccentric tension on the distal bicep tendons; without significant prior conditioning, it can lead to serious strains or tears in the crook of the elbow.
Advanced Variation Only: Due to the mechanical stress involved, the underhand grip should be treated as a specialized accessory movement rather than a daily staple, and only attempted once your “straight-arm” foundation is rock solid.
What About Front Lever With Neutral Grip?
For those training on gymnastics rings, the neutral grip is often considered the “sweet spot” for Front Lever progression. By turning your palms to face each other, you place your shoulders and elbows in their most anatomically natural position, which significantly reduces the risk of impingement or joint strain. This grip allows you to recruit the strength of your forearms and brachialis to assist the lats without the high injury risk associated with an underhand grip. If you find that straight-bar training causes “clicking” in your shoulders or discomfort in your elbows, switching to a neutral grip on rings is the most effective way to keep training heavy while prioritizing joint longevity.
Neutral Grip on Rings
Ring Instability Benefit: Because rings can move independently, using a neutral grip forces your stabilizing muscles to work harder, which builds a level of “functional” core and shoulder strength that a fixed bar cannot match.
Optimal Joint Health: The neutral position allows the humerus to sit naturally in the shoulder socket, making it the safest choice for athletes with a history of shoulder or elbow issues.
Balanced Muscle Recruitment: It provides a perfect middle ground between the back-dominant overhand grip and the arm-dominant underhand grip, allowing for a very stable and powerful horizontal hold.