In calisthenics and gymnastics, your hands are your foundation. When training on the floor, you are often limited by wrist flexibility, range of motion, and joint pain. If you want to progress past basic movements and unlock advanced bodyweight skills, there is one tool you absolutely need in your arsenal: calisthenics parallettes.
Whether you are trying to master your first clean push up without wrist pain or training for an full planche hold, parallettes alter the mechanics of your upper-body pushing movements.
In this comprehensive guide, we will break down exactly what parallettes are, why you should use them, and how to program the best parallette exercises to accelerate your gains.
What Are Calisthenics Parallettes?
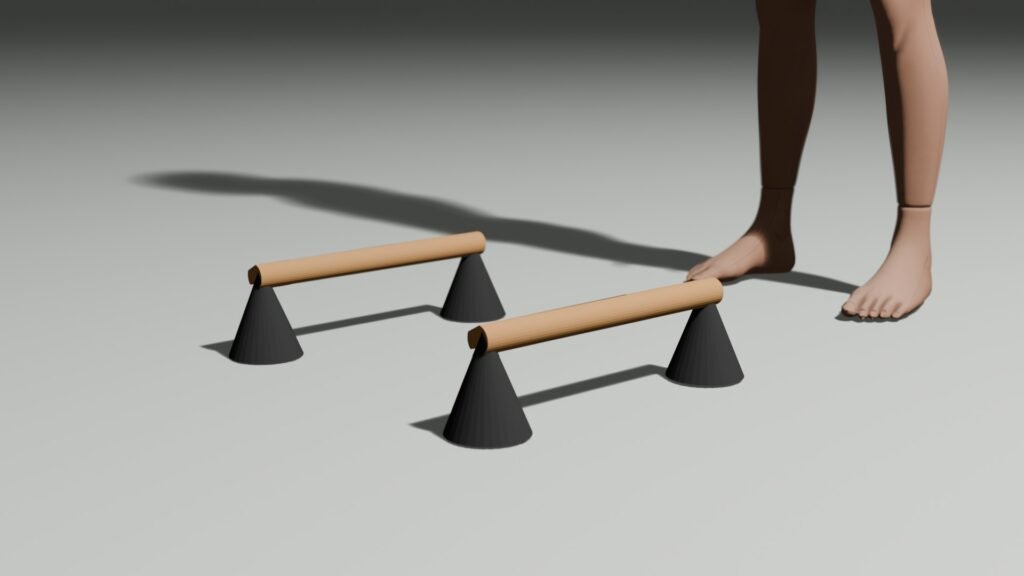
Parallettes (often called push up stands or mini-parallel bars) are portable fitness devices that mimic the parallel bars used by competitive gymnasts. They consist of two small, elevated bars positioned parallel to each other on a stable base.
Parallettes typically come in three different heights:
- Low Parallettes (2–6 inches): Perfect for handstands, push-up variations, and planche training because they keep you close to the ground for safety.
- Medium Parallettes (8–12 inches): The most versatile option. They offer enough clearance for L-sits, deep push-ups, and shoot-throughs.
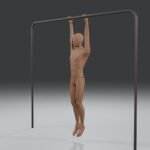
- Tall Parallettes / Equalizers (24+ inches): Essentially portable dip stations. These are tall enough to perform full parallel bar dips and inverted rows.
They are generally constructed from heavy-duty steel or high-quality wood. Wooden parallettes are highly favored by calisthenics athletes because they absorb sweat and provide a far superior grip compared to metal or plastic handles.
Why Use Parallettes? The 3 Major Benefits
If you can already train on a flat floor, why bother using equipment? Parallettes offer three distinct physiological advantages that floor training simply cannot match.
1. Instant Relief from Wrist Pain
When you do a standard push-up or handstand on the floor, your wrists are forced into extreme hyperextension (a 90-degree angle) while bearing your entire body weight. This is the number one cause of wrist strain in beginners.
Parallettes allow you to grip the bars with a neutral wrist alignment (your wrists remain straight, with your knuckles pointing forward). This safely redistributes the load up through your forearms and elbows, drastically reducing joint stress. If you are struggling with nagging joint issues, reading our Guide on How to Train Without Injuries alongside using parallettes can completely transform your recovery.
2. Deep Range of Motion (More Muscle Growth)
During a floor push-up, your movement stops the second your chest touches the ground. Your muscles are cut off right as they hit their maximum stretch.
By elevating your hands on parallettes, you create a deficit. This allows you to sink your chest below your hands at the bottom of the movement. This deep range of motion puts a massive, healthy stretch on your chest and shoulders, recruiting more muscle fibers and leading to faster strength and hypertrophy gains.
3. Essential Clearance for Advanced Skills
For exercises like the L-sit, your hips and legs must pass cleanly between your arms. Doing this on the floor requires elite compression strength and long arms. Medium-to-tall parallettes give your body the physical ground clearance needed to learn the technique properly without scraping your feet on the floor.
When Should You Start Using Parallettes?
There is a common myth that parallettes are only for gymnastics pros. In reality, they are useful at every single stage of your fitness journey:
- For Beginners: Use them from day one if you experience wrist discomfort during floor work or if you need to elevate your hands to make exercises more accessible.
- For Intermediates: Use them to increase the difficulty of your standard routines (like adding deficit depth to your push ups or trying your first L-sit holds).
- For Advanced Athletes: They are completely mandatory for mastering elite skills like handstand push-ups, 90-degree push-ups, and planches.
Top Calisthenics Parallettes Exercises
To get the most out of your equipment, structure your workouts around these high-yield movements. You can easily integrate these into our master 6-Week Beginner Bodyweight Program.
1. Deficit Push Ups
Take the classic push-up to the next level. Set your low or medium parallettes slightly wider than shoulder-width. Lower yourself slowly, allowing your chest to drop past the level of the wooden bars. Focus on an explosive drive back to the top.
- Form Tips: Keep your core tightly braced. To learn more about perfecting your alignment, read our Comprehensive Push-Up Guide.
2. Incline Push-Ups & Kneeling Variations
If you are brand new to pressing or recovering from an injury, you can place tall parallettes in front of you to perform incline push-ups. Alternatively, use low parallettes while keeping your knees on the floor. This lets you build straight-wrist strength with a fraction of your body weight.
3. Deficit Pike Push Ups
The absolute best shoulder builder in calisthenics. By walking your feet closer to the parallettes and driving your hips high into a “V” shape, you mimic a vertical shoulder press. The parallettes allow your head to travel deep below your hands, creating an incredible vertical pressing stimulus.
- Next Steps: Once you can do 12 strict reps here, you are ready for handstand work. Follow our detailed 4-Week Pike Push-Up Progression Program to learn the perfect pike push up.
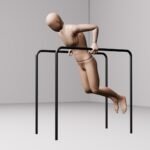
4. Parallette Dips
Using tall parallettes allows you to perform full, suspended dips anywhere. Grip the bars firmly, keep your elbows tucked at a 45-degree angle, and lower your hips until your shoulders drop slightly below your elbows.
- Scale it down: If full dips are too hard, place your feet on the floor in front of you to do bench-style dips using medium parallettes. Check out our Step-by-Step Dip Guide for full scaling options.
5. L-Sits and Tuck L-Sits
Place two medium parallettes next to your hips. Press down forcefully to lock your arms out, shrug your shoulders down away from your ears, and bring your knees to your chest (Tuck L-sit) or extend your legs straight out parallel to the floor (Full L-sit). This builds world-class core and hip flexor power.
6. Deep Core & Plank Holds
Simply holding a top plank position on low parallettes is an excellent way to build wrist endurance and scapular strength. For a massive core challenge, use the extra height of the bars to practice bringing your knees toward your elbows without touching the ground.
7. Advanced Skills: Planches & Handstands
For advanced athletes, parallettes provide a stable, grippable base to practice balancing. Trying to float your legs into a planche is significantly safer and easier to control on a pair of solid wooden parallettes than on a slippery, unforgiving floor.
Parallettes are also incredible for skill work. If you want to protect your wrists while learning upside-down balance, check out our step-by-step tutorial on how to master the handstand hold.
How to Choose the Right Pair
If you are ready to invest in a pair, keep these simple guidelines in mind:
- Material: Choose wood if you train primarily indoors and want the best grip possible. Choose steel if you plan to train outside in the grass or parks, as they withstand weather much better.
- Stability: Ensure the feet of the parallettes have wide, rubber non-slip pads. You do not want your stands wobbling or sliding while you are upside down.
- Height: If you are unsure, start with medium parallettes (around 10 inches tall). They offer the perfect balance of ground clearance for core work while still being low enough for safe push-ups and handstands.
Ready to Put Your Gear to Use?
Buying the right equipment is only half the battle; knowing how to program it is where real progress happens. Don’t train your movements in isolation. Take your parallettes and plug them directly into a structured routine designed to build balanced, full-body power.
Get started today with our free, step-by-step bodyweight training guide: Train at Home Without a Gym – A Simple Bodyweight Workout That Actually Works!