Pike Push Ups: The Ultimate Guide to Bodyweight Shoulder Strength
In calisthenics and bodyweight training, targeting your shoulders can be a challenge. For most people, the ultimate shoulder goal is the freestanding handstand push-up. However, those are incredibly advanced and require elite skill.
So, how do you start training your shoulders with your own bodyweight? Enter the pike push-up.
What Is A Pike Push-Up?
Pike push-ups, also known as bodyweight shoulder push-ups, are structurally identical to handstand push-ups, but with your feet remaining safely on the ground in an inverted “V” position.
This posture shifts a significant portion of your body weight off your shoulders, making the overhead pressing motion highly accessible for beginners and intermediates.
Pike Push-Ups Muscles Worked
Before diving into the form, it helps to know exactly what you are targeting. This movement primarily builds:
- Front Shoulders (Anterior Deltoids): The absolute main driver of the exercise that does most of the heavy lifting.
- Triceps: The muscles on the back of your arms that push you back up and lock out your elbows at the top.
- Upper Chest: The top portion of your chest muscles, which helps the shoulders push at an upward angle.
- Core and Rib Stabilizers (Serratus Anterior): The muscles around your stomach, spine, and sides of your ribs that keep your body tight and balanced while upside down.
What Equipment Do You Need?
The beauty of the pike push-up is its simplicity. To get started, you only need:
- Your Bodyweight: No gym membership required.
- A Flat Surface: A yoga mat or non-slip floor to protect your hands.
- Optional Progression Tools: A sturdy chair, bench, or yoga blocks to elevate your feet or hands as you advance through the program.
How to Do Pike Push-Ups with Perfect Form
Mastering pike push-up form requires strict attention to detail. Follow these steps to ensure you are targeting the right muscles:
- The Setup: Start in a standard push-up or kneeling position. Walk your feet toward your hands, driving your hips up into the air until your body forms an upside-down “V.”
- Hand & Shoulder Alignment: Place your hands shoulder-width apart. Actively press the floor away to straighten your arms and engage your shoulders. Your elbows should point straight back.
- Shift Your Weight: Elevate your heels and shift your weight forward onto your toes. You’ll know you’re doing it right when your upper body moves forward, your shoulders feel “heavy,” and your legs feel light. Your arms should be almost vertical.
- The Descent: Lean forward and lower your upper body by bending your elbows to a 45-degree angle. Lower down until your head nearly touches the ground. Crucial Tip: As you descend, your head must move in front of your hands, not directly between them.
- The Press: Push the floor away forcefully to return to the starting position. Lock out your arms at the top, shrug your shoulders slightly to maximize the range of motion, and repeat. Keep your core tight to prevent body swing.
Completing Your Upper-Body Push Routine
Pike push-ups target your shoulders and vertical pressing angle, but they only cover one piece of the upper-body puzzle. To balance your shoulders and build a complete pushing routine, you need to pair them with horizontal presses, dips, and scapular pulling movements. Explore our full bodyweight exercises guide to build a well-rounded training plan.
How To Make Pike Push Ups Easier For A Beginner
If standard pike push-ups are too difficult, adjust the angle of your hips. Widening the distance between your feet and hands reduces the vertical angle and lightens the load on your shoulders. You can also allow your shoulders to track slightly behind your hands at the bottom to get assistance from your upper chest.
If you are following a standard upper-body progression, your path to overhead power will generally look like this:
Incline Push Ups 🠖 Regular Push Ups 🠖 Dips 🠖 Pike Push Ups 🠖 Handstand Push Ups
4-Week Pike Push Up Progression Program
This 4-week program will systematically build your upper body pushing power, taking you from incline push-ups to regular push-ups, mastering dips, and finally conquering the pike push-up.
If you need more time on a specific week to hit the rep targets comfortably, repeat that week before moving forward. You can add exercises from this program to your regular training day and start working from there. If you have no other clear program you are doing now, check out this Beginner Bodyweight Workout Plan to get started with training.
Resting is key: Take 2–3 minutes of rest between sets. Moving from horizontal to vertical pushing taxes the chest, triceps, and shoulders heavily. You need your energy back to maintain perfect form.
Listen to your body: If you feel bad soreness or joint pain in your elbows or the front of your shoulders, take an extra rest day.
| Week | Focus | Day 1 | Day 2 | Day 3 |
| 1 | Horizontal Foundation | Incline Push-Ups: 3 sets of max reps (Hands on a bench or counter) | Incline Push-Up Negatives: 3 sets of 5 reps (5-second lowering phase) | High Plank Holds: 3 sets of max time (Building core and shoulder endurance) |
| 2 | Floor Mastery | Regular Push-Ups: 3 sets of 8 to 12 reps (Flat on the floor) | Regular Push-Up Negatives: 4 sets of 5 reps (6-second lowering phase) | Incline Push-Ups: 3 sets of Max Reps (Burnout set to build volume) |
| 3 | Vertical Power Shift | Dips: 4 sets of 6 to 8 reps (Using parallel bars or sturdy chairs) | Dip Negatives: 5 sets of 3 reps (8-second lowering phase) | Isometric Dip Holds: 3 sets of 15 seconds (Hold the bottom position of the dip) |
| 4 | The Pike Mastery | Pike Push-Up Attempts: 5 sets of max reps (Hips high, head moving forward of hands) | Regular Push-Ups / Dips: 3 sets of 10 reps (Maintaining your foundation) | Test Day! See how many strict, full-range Pike Push-Ups you can do! |
How Many Pike Push Ups To Get Handstand Push Ups?
If you are training for the freestanding handstand push-up (HSPU), the pike push-up is your absolute best stepping stone. But how many do you actually need to master before moving to the wall or the open floor?
As a general rule of thumb, you should be able to complete 8 to 12 clean, consecutive pike push-ups before transitioning to handstand push-up variations.
However, it isn’t just about hitting a random number, form dictates your strength carryover. If your hips are sagging or you are just pushing straight up and down like a standard push-up, 20 reps won’t help you.
Pro tip: Leverage the forward lean for HSPU carryover
Spend more time mastering your pike push-up form by focusing heavily on getting your head and shoulders well in front of your hands. You should lean far enough forward that your feet feel weightless and start to float off the ground.
Utilizing this specific technique allows you to accurately measure and track your shoulder strength progression. Once you build up that foundational power, it offers an incredible, direct transfer to advanced calisthenics skills like the press-to-handstand and freestanding handstand push-ups.
How to Prevent Injuries During Pike Push-Ups
Because pike push-ups are highly technical and load the upper joints heavily, safety and control are paramount. Read “How To Prevent Injuries” -guide for more in depth information, but for simplicity you can follow these guidelines to keep your joints healthy:
1. Warm up your wrists and triceps
Pike push-ups put immense pressure on your wrists. Always thoroughly stretch your shoulders, triceps, and wrists before a pressing session to prevent strain or hyperextension.
2. Form a “tripod” at the bottom
Lowering your head directly between your hands is terrible for your shoulder joints. Instead, move your head forward as you descend. Your hands and head should form a triangle (tripod shape) on the floor. This keeps the load safely on your deltoids and triceps.
3. Keep your elbows tucked
Flaring your elbows out to the sides under a heavy load can cause serious shoulder impingement. Keep your elbows tucked at a 45-degree angle relative to your torso throughout the entire movement.
4. Engage your core
Keep your midline tense and controlled. Do not let your lower back arch inward or your hips sag, as this leaks power and strains the spine.
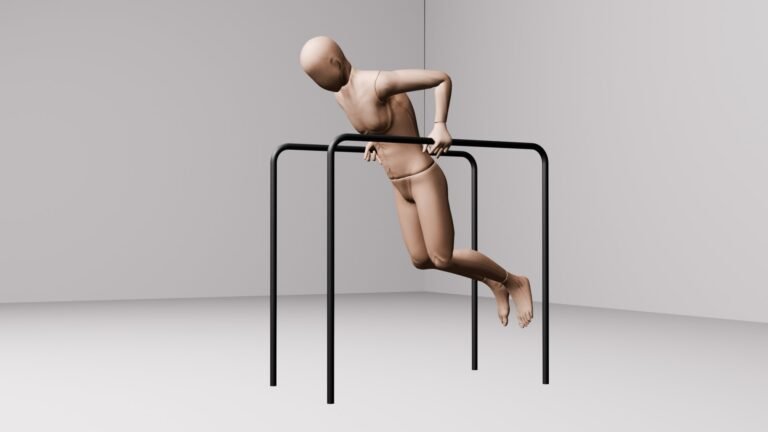
Calisthenics Parallettes for Full Overhead Mechanics
Because pike push-ups invert your body weight directly over your head, they put immense pressure on your wrists. If a 90-degree wrist bend on the floor causes you discomfort, switching to specialized handles changes everything. Holding a bar lets you maintain a completely neutral grip, routing the weight safely up your forearms while letting your head travel deeper for a massive vertical pressing stimulus.
Discover how to choose and set up the perfect pair for your shoulder days in our ultimate calisthenics parallettes guide.
5 Common Pike Push-Up Mistakes to Avoid
Are you hitting a plateau? Ensure you aren’t falling into these common training traps:
- Turning them into regular push-ups: Letting your hips drop converts the exercise into a chest press.
- Flaring your elbows: Putting your shoulder joints in a dangerous, compromised position.
- Keeping hands and feet too far apart: Reducing the vertical angle and turning it into a pseudo-planche push-up.
- Arching the lower back: Signifies a lack of core engagement.
- Rocking back to your heels: Dropping your weight backward during the upward press loses the shoulder-dominant stimulus.
The Benefits of Pike Push-Ups: Why You Should Do Them
Pike push-ups are the absolute foundation of calisthenics shoulder training. They teach body awareness, vertical pressing mechanics, and get you comfortable holding weight while inverted on your toes.
Building strong shoulders via the pike push-up unlocks elite bodyweight milestones, including longer handstands, wall-supported HSPUs, and the highly coveted L-sit to handstand.
How to Integrate Pike Push-Ups into Your Workout Routine
Pike push-ups are a mandatory addition to any “Push” day or upper-body routine. By combining regular push-ups (chest dominant), dips (lower chest/triceps dominant), and pike push-ups (shoulder dominant), you effectively target every pressing muscle in your upper body.
Accelerate Your Calisthenics Progress
Most beginners struggle with bodyweight training not because they lack potential, but because they skip the foundational steps.
If you are completely new to fitness and want to master the basics without any equipment, check out our comprehensive Train at Home Without a Gym-guide to jumpstart your results.
Once you have the basics down, keep your consistency high with our Beginner Bodyweight Workout Plan.
Mastered the Pike Push-Up? Here’s Your Next Step:
Now that you have a roadmap to build bulletproof shoulder strength, make sure the rest of your training is just as dialed in. Explore our ultimate calisthenics guides to perfect your form, avoid plateaus, and stay consistent:
- Perfect Your Foundations: How to Do Bodyweight Exercises Correctly (Ultimate Beginner Guide) — Master the exact mechanics of pulling, pushing, and squatting.
- Stay Safe and Strong: How To Train Without Injuries — Learn how to protect your wrists, elbows, and rotator cuffs as your workouts get harder.
- Build the Habit: How To Stay Consistent With Your Workouts — The secret to calisthenics success isn’t intensity; it’s showing up. Discover how to stick to your plan.
- Plan Your Week: How Often Should You Work Out As a Beginner? — Avoid burnout and maximize your muscle growth with the perfect weekly schedule.
Frequently Asked Questions (FAQ)
Are pike push-ups as good as overhead presses with weights?
Yes! While you can’t easily adjust the weight with a dial, pike push-ups build incredible overhead pressing strength, shoulder stability, and core control using your own body weight. They are the perfect functional alternative to a dumbbell shoulder press.
Why do my wrists hurt during pike push-ups?
Because your body is inverted, a lot of weight shifts directly onto your wrists. If you experience discomfort, ensure you thoroughly warm up your wrists beforehand. You can also perform the exercise using parallettes or push-up bars to keep your wrists in a neutral, straight position.
How often should I train pike push-ups?
For optimal muscle and strength building, aim to train them 2 to 3 times per week, allowing at least 48 hours of rest between sessions for your shoulders to recover.


