Okay now you are starting calisthenics or you have already trained for some time and now you might be asking yourself “Am I ready for handstand push ups yet?“.
Handstand push ups are one of the most impressive bodyweight exercises you can learn. They build serious shoulder strength, balance, and control.
But most beginners try them too early and get stuck or unmotivated.
The truth is, before you can do handstand push ups, you need a solid foundation of balance and strength.
Typical progression path for push-exercises would look something like this: Incline Push Ups 🠖 Regular Push Ups 🠖 Dips 🠖 Pike Push Ups 🠖 Handstand Push Ups
In this guide, you’ll learn:
- What even are handstand push ups
- A step-by-step progression
- How strong you need to be
- What skills to learn first
- When you’re ready to start training handstand push ups
- Common mistakes
- How long does it take to learn?
- Weekly training plan for handstand push ups
What are handstand push ups?
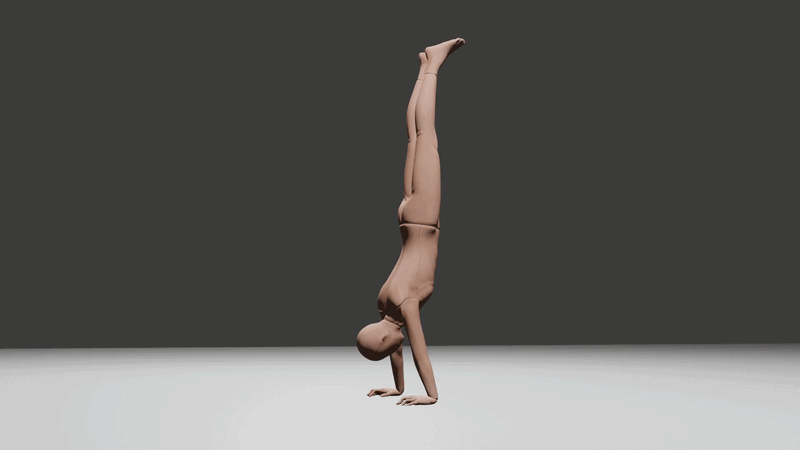
Handstand push ups are exactly what they sound like: a push up performed upside down in a handstand position.
They mainly train:
- Shoulders (primary muscle)
- Triceps
- Upper chest
- Core (for stability)
They are one of the best upper-body strength exercises in calisthenics, but really hard to perform.
How to handstand push up?
Step 1: You need to learn the handstand first
Before even thinking about push ups, you need to be able to hold a handstand. Here is my guide for handstands. Depending on how often you train, I would say consistent handstand can be possible on 1-2 months, but can also take up to 6 months. For me it took that 6 months, but to be honest I had some breaks and I did not train it regularly. I had some progression but not much, but when I started learning handstand seriously I learned it in couple months.
A realistic beginner goal is:
- Wall-supported handstand: 60 seconds
- Freestanding handstand (optional but great): 10-15 seconds
If you can’t hold a handstand yet, focus on:
- Wall handstand holds
- Wall walks
- Kicking up into a handstand
Balance comes first. Without it, handstand push ups are almost impossible.
Step 2: Required strength levels
Handstand push ups require a good base level of pushing strength.
Here are realistic strength benchmarks before you start:
- Push ups: 20-25 clean reps
- Pike push ups: 15-20 reps
- Decline push-ups: 10+ reps
- Plank/Hollow body holds: 60+ seconds
These exercises build the shoulder and core strength you need.
Step 3: Shoulder strength is the most important
Your shoulders do most of the work in a handstand push up.
If your shoulders are weak, you won’t be able to push yourself back up.
Good exercises to build shoulder strength:
- Pike push ups
- Elevated pike push-ups (feet on a chair)
- Wall-supported handstand holds
- Wall shoulder taps
You don’t need huge biceps. Handstand push ups are mainly a shoulder + triceps movement.
Step 4: Start with easier progressions
Don’t jump straight into full handstand push-ups.
Handstand push up progressions
Start with these progressions:
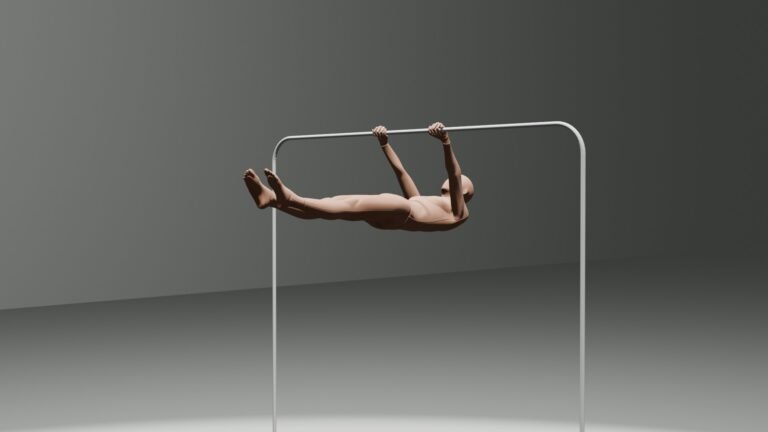
1. Pike push ups
Your body is in a “V” shape, feet on the ground.
This is the easiest version.
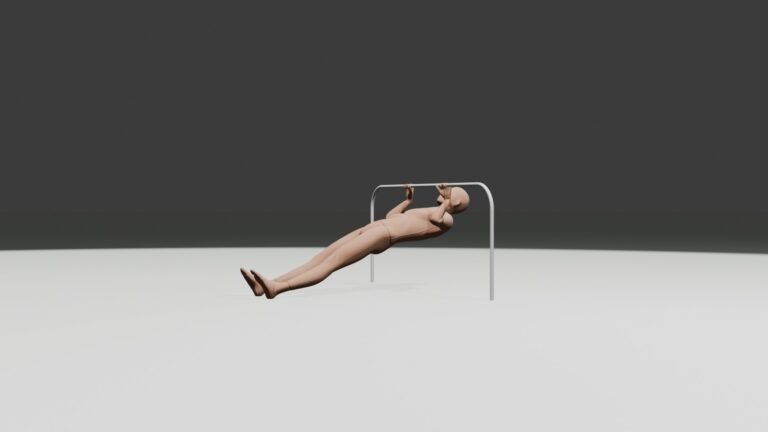
2. Elevated pike push ups
Put your feet on a chair or bench.
This increases the load on your shoulders.
3. Wall-supported handstand push ups (partial range)
Kick up against a wall and lower yourself halfway.
4. Full wall handstand push ups
Go all the way down and push back up.
5. Freestanding handstand push ups
The most advanced version.
How many pike push ups for handstand push ups?
You’re ready to start training handstand push ups if:
- You can hold a wall handstand for 60+ seconds
- You can do 20+ pike push ups
- You have good control and balance upside down in the regular free handstand position
- You feel comfortable being inverted and you have stretched well enough so you don’t get injuries!
If you don’t meet these yet, focus on building strength first. The progression is much faster in the long run when you do the training right.
My personal tip is to definitely spend some extra time nailing your pike push-up form. Try shifting your weight forward so your head and shoulders are ahead of your hands—you’ll actually feel your feet want to lift off the ground as you balance. Dialing this in helped me track my shoulder strength, and once that clicked, it made a huge difference for my press-to-handstands and freestanding HSPUs.
Common mistakes
Beginners often struggle because of these:
- Skipping handstand practice
- Not building enough shoulder strength
- Trying full reps too early
- Arching the lower back too much
- Rushing instead of controlling the movement
Fixing these makes a huge difference.
How long does it take to learn?
It depends on your starting level, but most beginners can reach their first handstand push up in:
- 4-12 weeks with consistent training
Faster if you already have good upper-body strength.
Weekly training plan for handstand push ups
This simple plan will help you build the strength and balance needed for your first handstand push-up.
Train 3 times per week (for example: Monday, Wednesday, Friday).
Day 1 – Strength Focus
1. Pike Push Ups
3 sets of 8-12 reps
2. Elevated Pike Push Ups (feet on chair)
3 sets of 6-10 reps
3. Push Ups
3 sets of 10-20 reps
4. Plank
3 sets of 30-60 seconds
Focus on controlled movement and good form.
Day 2 – Balance & Control
1. Wall Handstand Hold
4 sets of 30-60 seconds
2. Wall Walks
3 sets of 3-5 reps
3. Shoulder Taps (against wall or floor)
3 sets of 10-20 taps
4. Pike Hold (hips high position)
3 sets of 20-40 seconds
Take your time. Balance improves slowly and patience is key.
Day 3 – Progression Day
1. Elevated Pike Push Ups
3 sets of 8-12 reps
2. Wall Handstand Push Ups (partial range)
3 sets of 3-6 reps
3. Negative Handstand Push Ups (slow lowering)
3 sets of 3–5 reps
4. Wall Handstand Hold
2-3 sets to max time
This is where you start getting closer to full handstand push ups.
How to progress each week
To keep improving, aim to:
- Add 1-2 reps per set, OR
- Increase hold time by 5-10 seconds, OR
- Improve control and balance
Small progress every week is enough.
When to move to full handstand push ups
You’re ready to try full reps when:
- You can do 5+ clean wall handstand push ups
- You can control the lowering phase slowly
- You feel stable upside down
Important tips
- Rest at least 1 day between workouts
- Don’t rush progressions
- Focus on quality, not just reps
- If something feels too hard, go back one step
Progress with handstand push ups doesn’t happen overnight. It takes patience, consistency, and effort. But every second you spend upside down and every rep you complete brings you closer. Stick with it, trust the process, and you’ll get there. It is so impressive skill to be able to do that is is worth it.
Improve Your Results With Proper Training
If you’re doing handstand push ups as part of your training, make sure you’re also focusing on proper form, progression, and consistency.
Most beginners struggle not because the exercise is bad, but because they’re missing the basics. If you are just starting out and looking to learn the basics of bodyweight training without equipment, this Beginner No Equipment Bodyweight Training Guide will get your started easily and you will make your workouts so much better and see result in no time!
Once you have the basics down, you can try this very simple Beginner Bodyweight Workout Plan to stay on track until you want to move onto some more advanced exercises.
If you are struggling with bad form, injuries or lack of motivation, you can also check these: