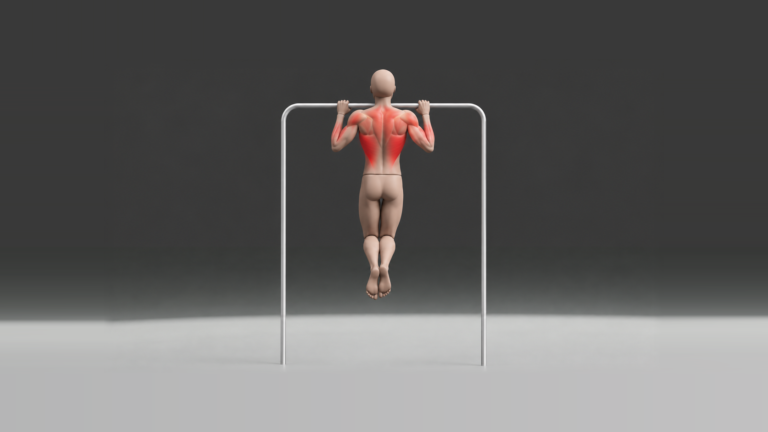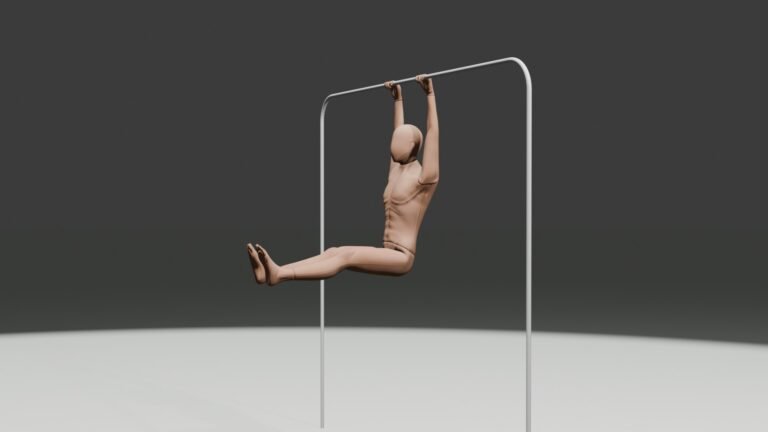

Chin-ups are one of the best bodyweight exercises for building pulling strength in your back and arms. All you need is a secure pull-up bar, but lifting your entire bodyweight can be challenging when you’re starting out.
The main difference between chin-ups and regular pull-ups is your grip. Chin-ups use an underhand grip, with your palms facing toward you.
This changes how your arms contribute to the movement. Many people find chin-ups easier than overhand pull-ups, although that isn’t true for everyone.
I personally prefer chin-ups when I want to focus more on my biceps. Sometimes I train them instead of regular pull-ups, and I also enjoy weighted chin-ups when I want a harder variation.
Whether you’re learning your first chin-up or trying to build more repetitions, this guide covers proper technique, common mistakes, beginner progressions, and practical workouts.
Quick Chin-Up Form Check
Use this checklist whenever you need a quick technique reminder during your workout.
- Grip: Palms facing you, hands approximately shoulder-width apart.
- Start: Arms extended, body controlled, core gently braced.
- Pull: Drive your elbows down toward your sides.
- Top: Bring your chin above the bar without reaching forward with your neck.
- Lower: Return to the starting position under control, without swinging.
Main tip: Focus on controlled repetitions rather than forcing additional reps with momentum.
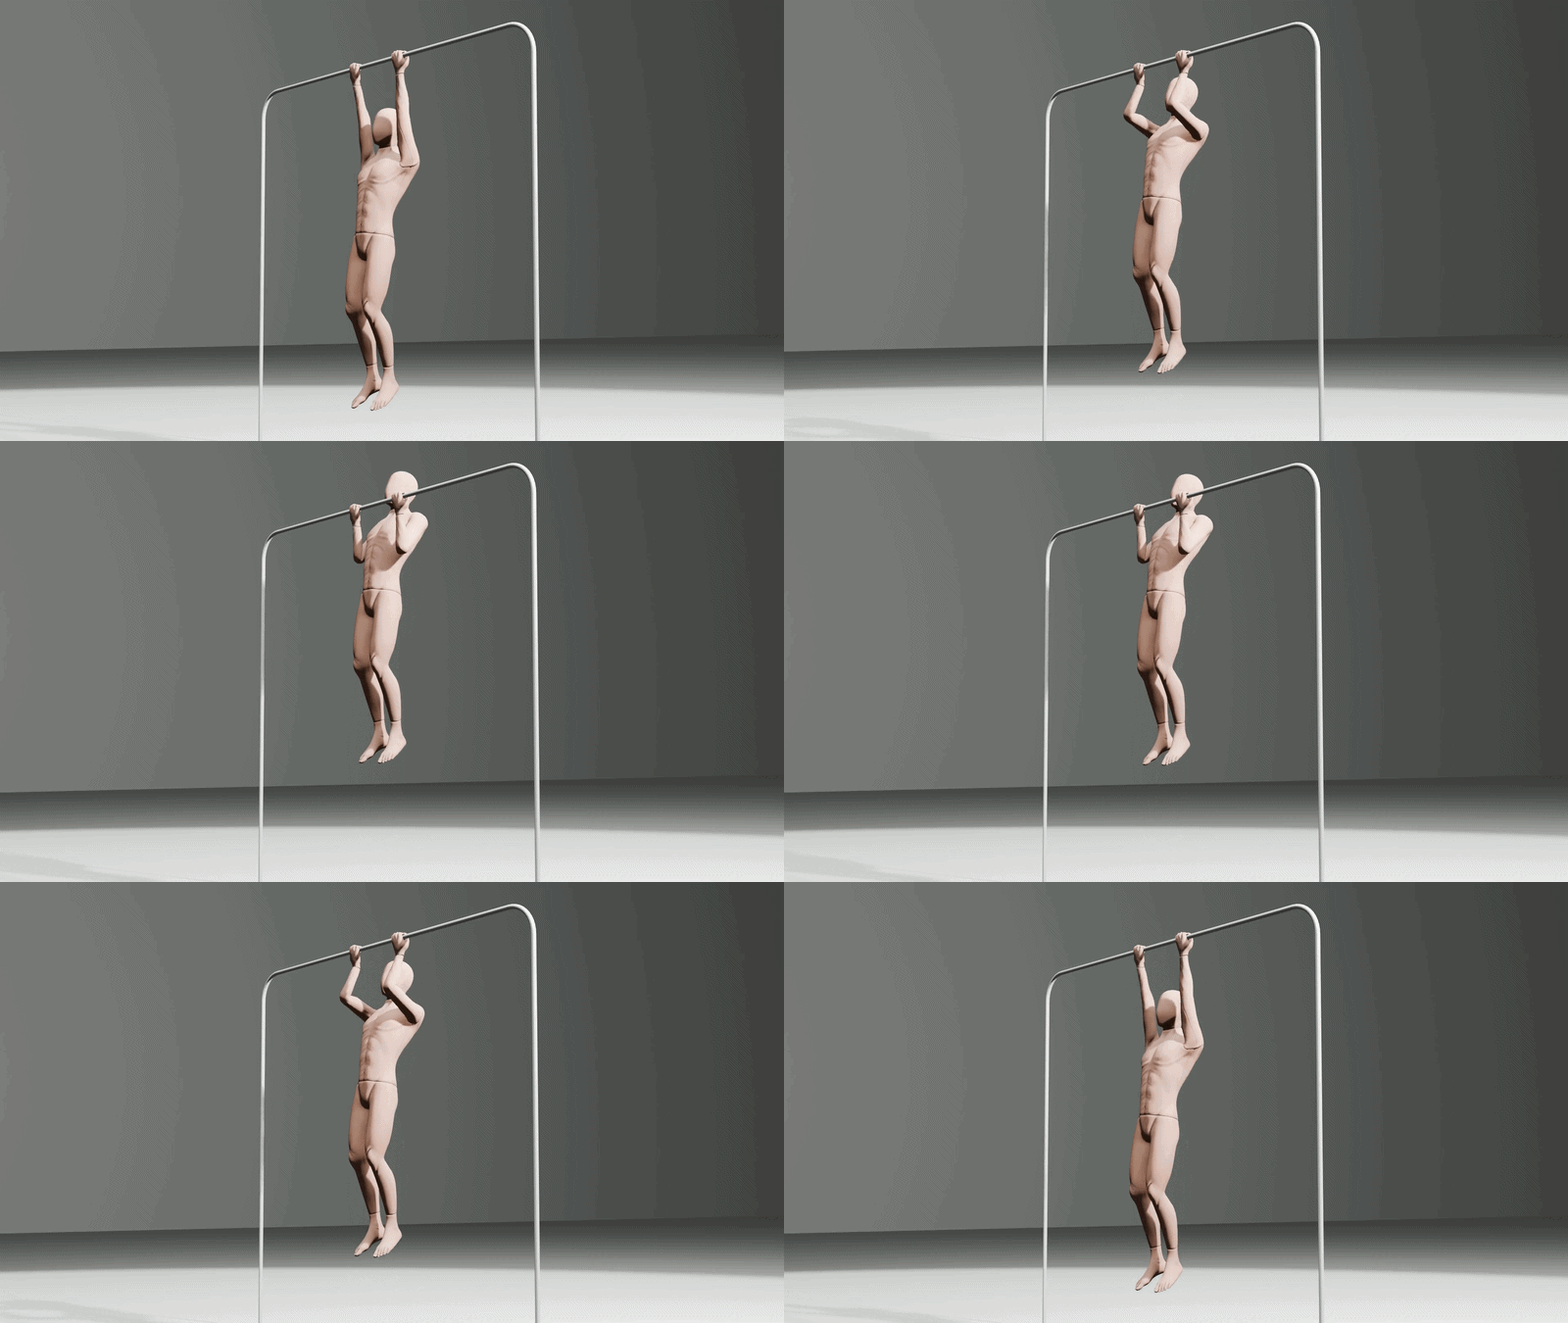
Table of Contents
How to Do Chin-Ups With Proper Form
A proper chin-up involves pulling your body from an overhead hanging position until your chin rises above the bar, then lowering yourself under control.
Here’s how to perform the movement step by step.
Step 1: Use an Underhand Grip
Stand underneath a secure pull-up bar.
Grab the bar with your palms facing toward you and your hands approximately shoulder-width apart.
Wrap your thumbs around the bar for a secure grip.
You can experiment with slightly different hand widths if needed, but avoid forcing an excessively narrow grip that feels uncomfortable on your wrists or elbows.
Step 2: Start in a Controlled Hang
Lift your feet off the floor and allow your arms to extend overhead.
Keep your body reasonably straight and gently brace your abdominal muscles.
Your shoulders should be able to move naturally as your arms reach overhead. You don’t need to force them into a rigid position.
If a complete overhead hang is uncomfortable, work within a comfortable range and investigate the cause before progressing.
Step 3: Pull Your Elbows Down
Begin pulling yourself upward by bending your elbows and moving your upper arms down toward your sides.
A useful technique cue is:
Think about driving your elbows toward your ribs rather than simply trying to lift your chin.
Your back and arms work together throughout the movement.
You don’t need to isolate your biceps or consciously move your shoulder blades through a separate step before every repetition.
Step 4: Bring Your Chin Above the Bar
Continue pulling until your chin clears the bar.
Keep your head in a natural position instead of stretching your neck forward to make the repetition count.
It’s fine if your torso leans back slightly as you pull.
However, avoid turning the movement into a large swing.
You don’t need to touch your chest to the bar to complete a standard chin-up.
Step 5: Lower Yourself Under Control
Gradually extend your elbows as you lower your body.
Return to a controlled bottom position with your arms extended through a comfortable range.
Avoid abruptly dropping from the top.
There is no need to count an exact number of seconds during every repetition.
The goal is a smooth, repeatable movement.
Step 6: Repeat While Maintaining Your Technique
Perform additional repetitions while keeping your grip, body position, and range of motion consistent.
If you begin swinging excessively or cannot reach the bar without stretching your neck, you’re probably approaching the end of your useful set.
Stop before your technique deteriorates significantly.
What Muscles Do Chin-Ups Work?
Chin-ups are a compound pulling exercise, meaning several muscle groups work together to lift and stabilize your body.
| Muscle group | Role during chin-ups |
|---|---|
| Latissimus dorsi (lats) | Helps pull your upper arms down toward your torso |
| Biceps brachii | Helps bend your elbows during the pulling phase |
| Brachialis and brachioradialis | Assist with elbow flexion |
| Upper-back muscles | Help control your shoulder blades and upper-body position |
| Forearms | Maintain your grip on the bar |
| Core muscles | Help stabilize your torso and limit unnecessary swinging |
Do Chin-Ups Work Your Biceps?
Yes. Chin-ups can be an excellent compound exercise for training your biceps.
The underhand grip places your forearms in a supinated position, which changes the contribution of the elbow-flexing muscles compared with an overhand grip.
A study by Youdas and colleagues found greater biceps muscle activation during chin-ups than during conventional overhand pull-ups.
However, this doesn’t prove chin-ups will always produce more biceps growth over time. Training effort, volume, recovery, and progressive overload still matter.
Do Chin-Ups Work Your Back?
Absolutely.
Your lats contribute substantially to pulling your upper arms downward, while other back muscles help control the movement.
Chin-ups aren’t simply a biceps exercise with a little back involvement.
They train both your back and arms together.
If you’re interested in how the muscles work during different pulling variations, see our Pull-Up Muscles Worked Guide.
Chin-Ups vs. Pull-Ups: What’s the Difference?
The main difference is your hand position.
| Feature | Chin-Ups | Pull-Ups |
|---|---|---|
| Grip | Underhand, palms toward you | Overhand, palms away |
| Main muscles | Back and elbow flexors | Back and elbow flexors |
| Biceps involvement | Often greater in EMG comparisons | Still substantial |
| Difficulty | Often feels easier | Often feels harder |
| Equipment | Standard secure pull-up bar | Standard secure pull-up bar |
Both exercises are effective for developing upper-body pulling strength.
Some people can perform more chin-ups than pull-ups because the underhand position suits their strength and mechanics.
However, individual differences matter.
I personally find chin-ups easier than regular pull-ups, but that doesn’t mean everyone will experience the same difference.
If your goal is to become better at overhand pull-ups, keep practicing overhand pull-ups. Chin-ups can complement that training, but they don’t completely replace movement-specific practice.
For a more detailed comparison, read our Chin-Ups vs. Pull-Ups vs. Neutral Grip Guide.
How to Get Your First Chin-Up
If you can’t perform a chin-up yet, you don’t need to keep attempting full repetitions until something changes.
Use easier exercises that let you build the necessary strength.
You can begin at whichever stage matches your current ability.
Beginner Chin-Up Progression
| Your current ability | What to practice |
|---|---|
| Can’t comfortably support yourself on the bar | Feet-assisted hangs |
| Can hang but can’t pull upward | Assisted chin-ups and inverted rows |
| Can complete a few assisted chin-ups | Build controlled repetitions |
| Can complete 6-8 assisted chin-ups comfortably | Try using less assistance |
| Almost able to complete a full chin-up | Assisted full-range reps and optional negatives |
| Can complete 1-3 chin-ups | Start workouts with unassisted reps, then use assistance |
These are guidelines, not requirements.
You don’t need to reach a particular hanging-time target before starting assisted chin-ups.
1. Feet-Assisted Hangs
If your grip or hanging strength is a limitation, start with a stable platform underneath the bar.
Grip the bar and gradually transfer some weight onto your arms while your feet provide support.
Try 2 sets of 10-20 seconds to begin.
Reduce the support from your legs as your strength improves.
For more information, read our Dead Hang Guide.
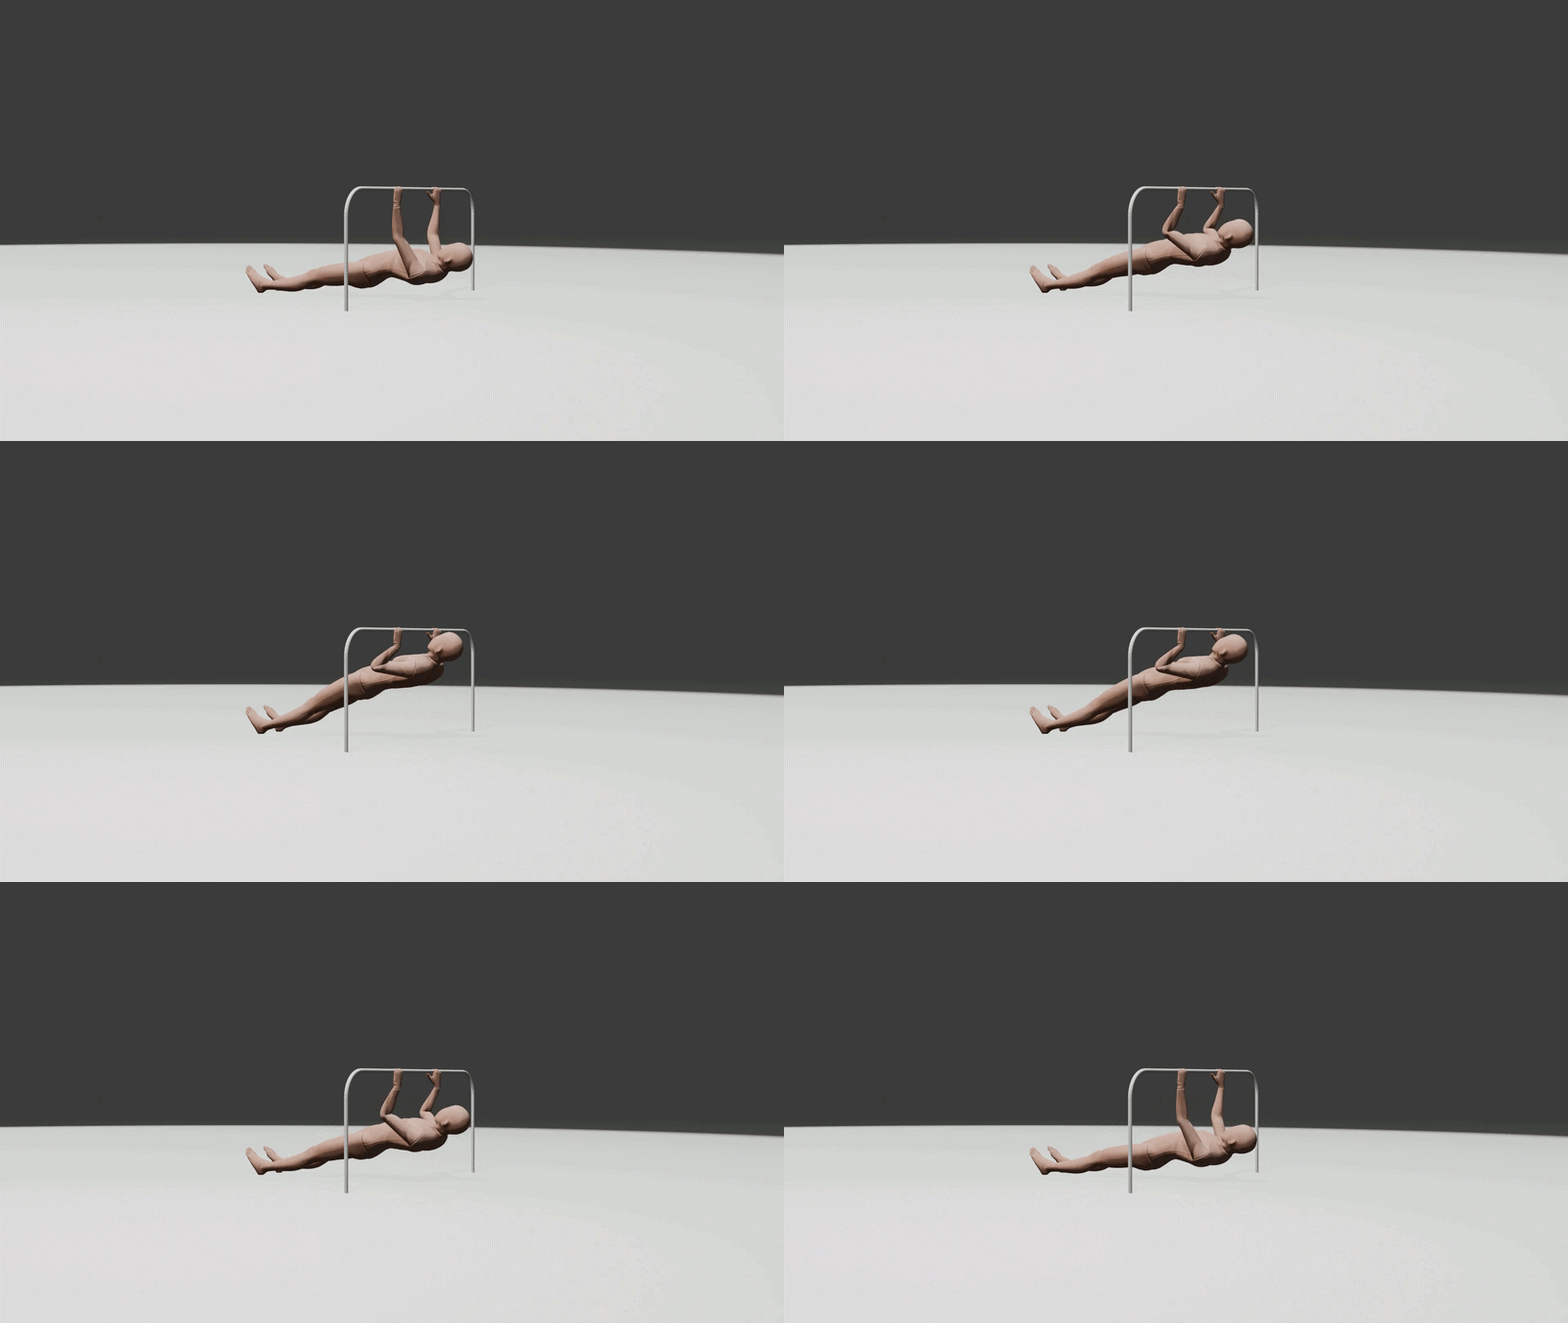
2. Inverted Rows
Inverted rows develop upper-body pulling strength without requiring you to lift your entire bodyweight vertically.
You can adjust the difficulty by changing the angle of your body.
Start with your knees bent or your torso more upright if needed.
Try 3 sets of 6-12 repetitions.
They aren’t identical to chin-ups, but they can be useful alongside assisted chin-up practice.
See our Inverted Row Guide for instructions.
3. Band-Assisted Chin-Ups
Resistance bands are useful because they allow you to practice the full chin-up movement with less of your bodyweight to lift.
Attach a suitable assistance band securely to your pull-up bar according to the manufacturer’s instructions.
Carefully position your foot or knee in the band and perform controlled chin-ups.
Choose a band that allows approximately 5-8 clean repetitions.
If you can comfortably perform 3 sets of 8, try a band that provides less help.
You may initially complete fewer repetitions with the lighter band, and that’s fine.
Progress means you’re lifting more of your own weight.
Are Resistance Bands Worth Using?
If you’re struggling to perform your first chin-up, a set of assistance bands can be a practical purchase.
They allow you to scale the movement instead of repeatedly attempting a version that’s too difficult.
Look for bands with clearly stated resistance ranges, suitable weight ratings, and reliable construction.
A set with different assistance levels can be useful as your strength increases.
Optional equipment: Chin-Up Resistance Bands
Resistance bands aren’t essential. You can also use an assisted pull-up machine or controlled feet-assisted variations.
Always check your band for damage and use a stable platform when getting into or out of it.
4. Negative Chin-Ups
Negative chin-ups focus on lowering yourself from the top position.
Use a stable platform to get your chin above the bar.
Then gradually transfer your weight onto your arms and lower yourself under control.
Try 2 sets of 2-3 repetitions, with each descent lasting approximately 2-5 seconds.
If you cannot control the lowering movement, use more assistance first.
Negatives can be demanding, so you don’t need to add lots of them to every workout.
5. Your First Unassisted Chin-Up
Once you’ve developed some assisted pulling strength, try a full chin-up while you’re fresh.
If you achieve one clean repetition, that’s your starting point.
You don’t need to immediately perform multiple full sets without assistance.
You can begin with one or two unassisted repetitions, then use a resistance band for additional training.
This lets you practice lifting your full bodyweight while accumulating more quality repetitions.
Beginner Chin-Up Workout
Start with two or three pulling sessions per week, depending on your experience, recovery, and other training.
Choose the workout that matches your current level.
Workout A: If You Can’t Do a Chin-Up Yet
| Exercise | Sets and reps |
|---|---|
| Band-assisted chin-ups | 3 × 5-8 |
| Inverted rows | 3 × 6-12 |
| Feet-assisted or full hangs | 2 × 10-20 sec |
| Optional negative chin-ups | 2 × 2-3 |
Rest approximately 1-3 minutes between sets, taking longer when necessary.
Your main goal: Gradually reduce assistance while maintaining controlled repetitions.
If band-assisted chin-ups are still too difficult, start with feet-assisted pulling and rows.
Workout B: If You Can Do 1–5 Chin-Ups
| Exercise | Sets and reps |
|---|---|
| Unassisted chin-ups | 3 controlled sets |
| Band-assisted chin-ups | 2 × 5-8 |
| Inverted rows | 2 × 8-12 |
Begin with unassisted chin-ups while you’re fresh.
If you can only perform one repetition per set, that’s fine.
Avoid forcing every set to failure.
Afterward, complete your assisted repetitions to add more pulling practice.
Your main goal: Gradually increase your total unassisted repetitions.
If you need a more detailed zero-to-first-rep program, our Beginner Pull-Up Progression Guide explains how to organize assisted training.
Common Chin-Up Mistakes and How to Fix Them
Even experienced athletes sometimes develop habits that make chin-ups less controlled.
| Common mistake | What to do instead |
|---|---|
| Swinging your legs | Brace your core and use controlled pulling |
| Stretching your neck over the bar | Pull your body higher instead of reaching with your chin |
| Cutting the bottom range short | Lower through a comfortable, consistent range |
| Dropping too quickly | Control the descent |
| Using an uncomfortable grip width | Adjust your hands to a more natural position |
| Forcing repetitions when exhausted | Stop when technique noticeably deteriorates |
What If You Feel Chin-Ups Mostly in Your Arms?
That’s not automatically a problem.
Your biceps and other elbow-flexing muscles contribute substantially to chin-ups.
Your lats are still involved even when you feel the exercise more strongly in your arms.
Rather than attempting to eliminate biceps involvement, concentrate on performing full, controlled repetitions.
You can experiment with the cue of driving your elbows down toward your sides.
What If You Can’t Get Your Chin Over the Bar?
You may simply need more strength at that difficulty.
Use assisted full-range chin-ups to practice reaching the top.
You can also experiment with a few controlled negatives if appropriate.
Avoid compensating by stretching your neck forward.
What If Chin-Ups Hurt Your Wrists or Elbows?
Don’t force a grip position that consistently causes pain.
You can experiment with a modest change in hand width or, if suitable equipment is available, a different grip orientation.
No grip is universally pain-free or injury-proof.
Stop painful exercises and seek professional guidance when symptoms persist, worsen, or interfere with everyday activities.
See our Elbow and Shoulder Pain During Pull-Ups Guide for additional general information.
How to Progress Once Chin-Ups Become Easier
Once you can perform several controlled chin-ups, there are different ways to increase the difficulty.
You don’t need to attempt all of these variations.
Choose one based on your training goal.
| Variation | Why try it? |
|---|---|
| More bodyweight repetitions | Improve your chin-up repetition capacity |
| Paused chin-ups | Practice control at challenging positions |
| Weighted chin-ups | Increase pulling resistance |
| L-sit chin-ups | Add a demanding core-position challenge |
| Slower controlled repetitions | Make it easier to focus on movement quality |
Increasing Your Repetitions
If you’re currently performing 3 sets of 5 chin-ups, work toward adding more controlled repetitions over time.
For example:
- 5, 5, 5
- 6, 5, 5
- 6, 6, 5
- 6, 6, 6
You don’t need to increase the total every session.
Progress can be gradual, and repeating the same performance while maintaining better technique is also useful.
Weighted Chin-Ups
Weighted chin-ups are a natural progression when bodyweight chin-ups become manageable.
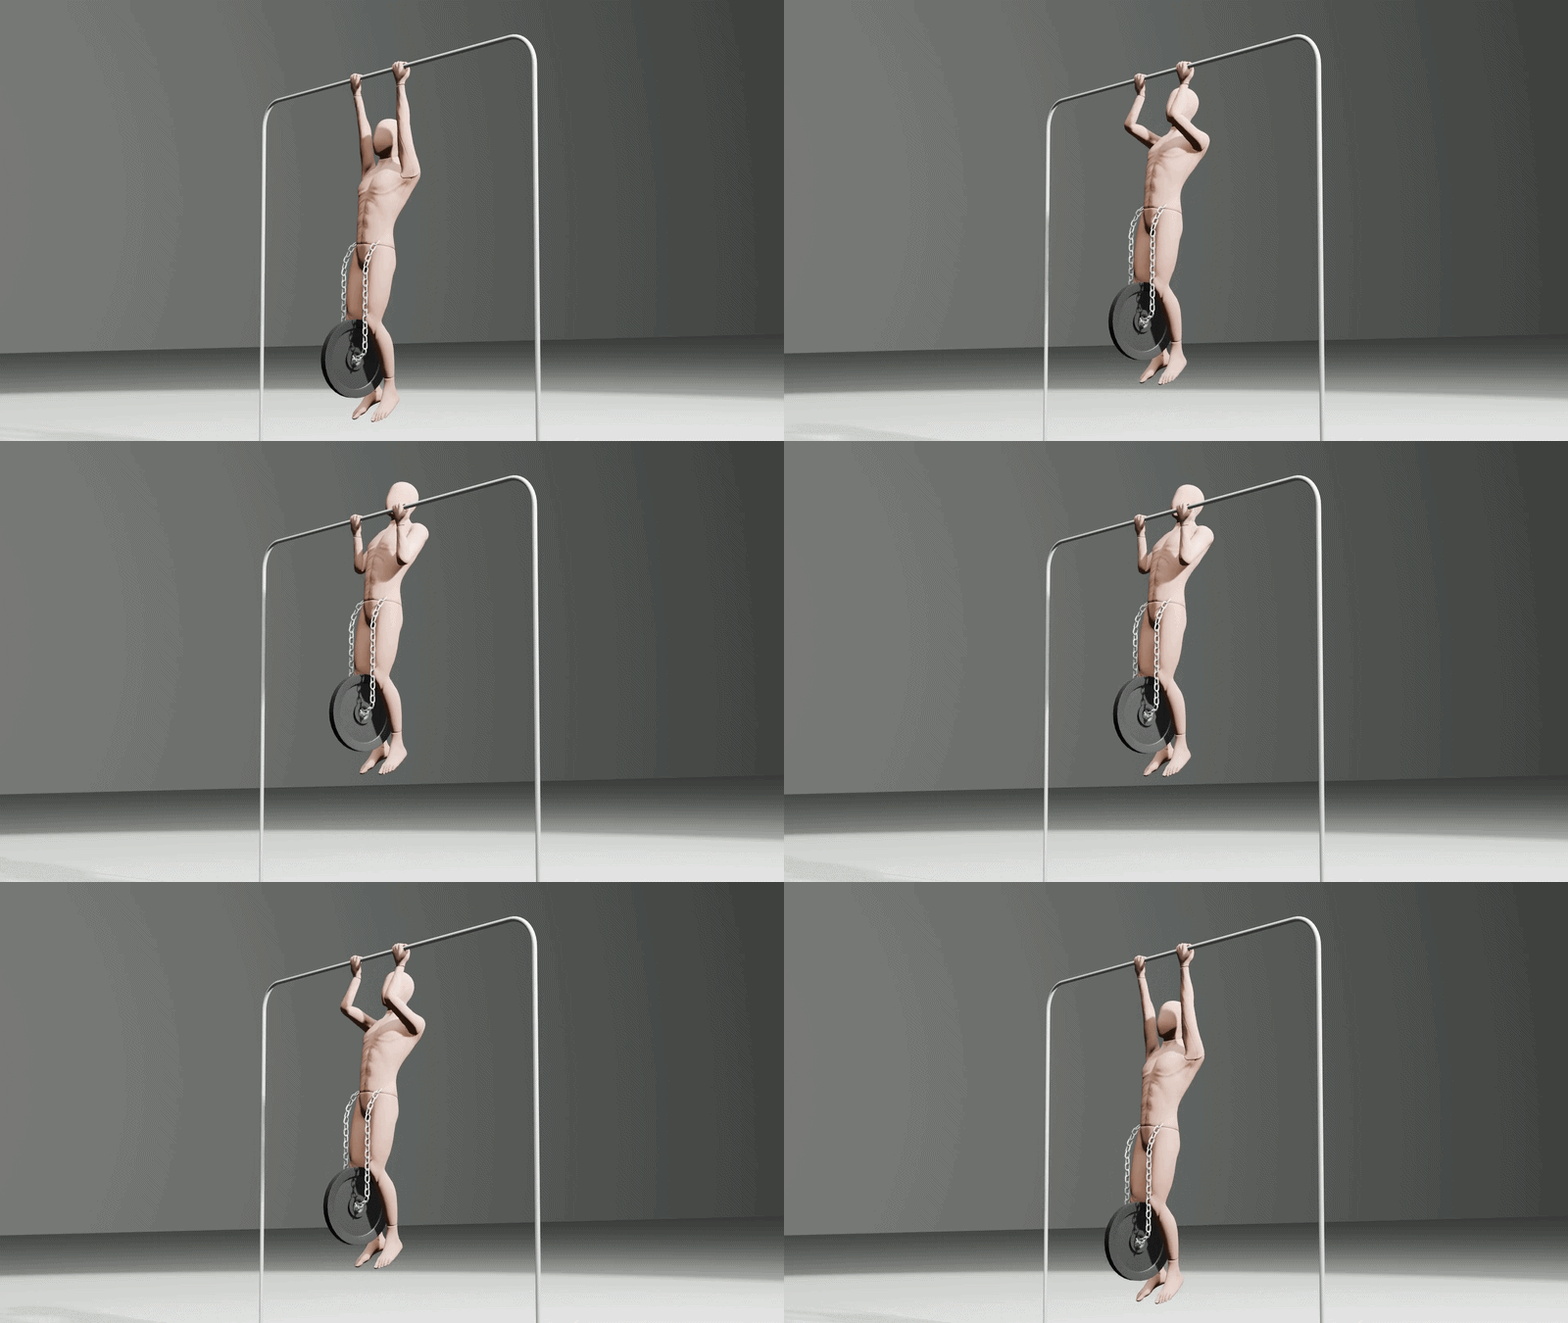
You can use a securely fitted dip belt designed for added weight or another appropriately rated loading method.
For example, if you can consistently perform several sets of controlled chin-ups, you could experiment with a small amount of additional weight.
Start conservatively, maintaining the same technique you use without external resistance.
Weighted chin-ups aren’t reserved for people who can perform exactly 10 or 12 bodyweight repetitions. Your readiness depends on control, strength, and experience rather than one universal threshold.
Are Dip Belts Worth Buying?
A dip belt can be useful if you’re regularly performing weighted chin-ups or weighted dips.
It allows you to add resistance without changing the basic movement.
Look for suitable weight capacity, secure attachment hardware, and a comfortable fit.
Optional equipment: Gymreapers Dip Belt With Chain For Pull Ups
You don’t need to purchase one until additional external resistance is genuinely useful for your training.
My Experience With Chin-Ups and Biceps Training
Chin-ups have become one of my favorite pulling exercises, especially when I want to give my biceps more attention.
Personally, the underhand grip feels easier than regular overhand pull-ups.
Sometimes I complete a difficult set of pull-ups and then perform an additional set of chin-ups.
Other sessions, I skip regular pull-ups entirely and focus on chin-ups or weighted chin-ups.
When performing chin-ups, I enjoy concentrating on bending my elbows and squeezing my biceps during the pulling movement.
It gives me a strong muscular sensation, which makes the exercise enjoyable.
However, that burning sensation isn’t proof of greater muscle growth.
The important part is still performing productive sets with enough effort and gradually improving over time.
My main advice is to choose the pulling variation that fits your current goal.
If I want to focus on standard pull-up strength, I practice pull-ups.
If I want a pulling session with more emphasis on my arms, chin-ups are often my choice.
Both can have a place in a balanced training program.
How to Include Chin-Ups in Your Workout
You don’t need a separate chin-up workout every time you train.
You can include chin-ups as your main pulling exercise or use them after other pulling movements.
If Your Main Goal Is Strength
Use a challenging chin-up variation that allows you to maintain good technique.
For example:
3-4 sets of 3-6 repetitions, with sufficient rest between sets.
If your bodyweight is already challenging enough, there’s no need to add external weight.
If Your Main Goal Is Muscle Growth
Use a variation that allows you to perform controlled, challenging sets.
For example:
3 sets of 6-12 repetitions, adjusted to your current strength.
You can use assistance if you cannot yet complete this range with your bodyweight.
This is a practical example, not the only repetition range that can build muscle.
If You’re Combining Chin-Ups and Pull-Ups
One option is to alternate your main exercise between sessions:
| Session | Main pulling exercise |
|---|---|
| Workout A | Pull-Ups |
| Workout B | Chin-Ups |
Another option is to perform a few sets of both in the same workout.
Just remember that both exercises work many of the same muscles.
Your recovery and total weekly volume still matter.
For a broader bodyweight program, see our Beginner Bodyweight Training Program.
Frequently Asked Questions
Are Chin-Ups Easier Than Pull-Ups?
Many people find chin-ups easier because of the underhand grip and different pulling mechanics.
However, the difference depends on individual strength, technique, and training experience.
Can You Build Big Biceps With Chin-Ups?
Chin-ups can contribute significantly to biceps development because your elbow-flexing muscles work hard during the movement.
However, they aren’t necessarily a complete replacement for direct biceps training if maximizing arm growth is your primary goal.
Are Chin-Ups Good for Beginners?
Yes, provided the difficulty is appropriate.
If you can’t perform an unassisted chin-up yet, assisted variations and rows are useful starting points.
Should You Do Chin-Ups Every Day?
Daily chin-ups aren’t necessary.
Many people can improve with two or three focused pulling sessions per week.
The right frequency depends on your total training workload, recovery, and exercise difficulty.
Should Your Chin Go Above the Bar?
For a standard full chin-up, aim to raise your chin above the bar without extending your neck forward.
You don’t need to touch your chest to the bar.
Are Close-Grip Chin-Ups Better for Biceps?
A narrower grip changes the movement mechanics, but it doesn’t automatically produce better biceps growth.
Use a grip width that feels comfortable and allows you to train consistently.
Can You Do Chin-Ups Instead of Pull-Ups?
Yes, if your main goal is general back and arm strength.
However, if you specifically want to improve standard overhand pull-ups or skills that depend on them, you should continue practicing those movements too.
Final Thoughts: Building Stronger Chin-Ups
Chin-ups are a straightforward but challenging way to develop upper-body pulling strength.
They train your lats, biceps, upper back, forearms, and core while requiring very little equipment.
If you’re just starting, use an easier progression that lets you practice controlled repetitions.
If you can already perform several chin-ups, gradually increase your repetitions or explore harder variations such as weighted chin-ups.
The most important things to remember are:
- Use a comfortable underhand grip.
- Pull without relying on excessive swinging.
- Bring your chin above the bar without stretching your neck.
- Lower under control.
- Progress gradually while maintaining good technique.
You don’t need to rush toward advanced variations. A few well-controlled chin-ups are a solid foundation for building strength.
If you want to explore more pulling exercises, continue with our Complete Pull-Ups Guide or compare different hand positions in our Pull-Up Grip Comparison Guide.
Disclaimer: This guide provides general fitness education and does not replace individualized medical or rehabilitation advice.