What Is An Inverted Row?
The Inverted Row – also known as the Australian pull up – is a horizontal pulling exercise where you hang underneath a bar or a set of rings with your feet on the ground. By pulling your chest toward the bar, you work almost every muscle in your upper back and core.
In the calisthenics community, it is affectionately known as the “Australian Pull-Up” because you are “down under” the bar. While the pull-up is a vertical pull, the inverted row is a horizontal pull, making it the perfect antagonist movement to the push-up.
Every Beginner Calisthenics Routine Needs Inverted Rows
Many beginners without enough pulling strength make the mistake of skipping rows to focus solely on pull-ups. However, for beginners the inverted row is a mandatory staple for three main reasons:
- Posture Correction: Most of us spend our days hunched over phones or keyboards. Inverted rows strengthen the rhomboids and rear deltoids, which pull your shoulders back and fix “gamer posture.”
- The Perfect Progression: Not everyone can do a pull-up on day one. Inverted rows allow you to adjust the weight of your own body by changing your body angle, making it the most accessible back exercise in existence.
- Balanced Strength: If you only do push-ups, your chest will eventually overpower your back, leading to shoulder pain. The inverted row balances the “push” with a “pull.”
Typical progression path for pull-exercises would look something like this: Dead Hang 🠖 Inverted Rows 🠖 Chin Ups 🠖 Pull Ups 🠖 Weighted Chin Ups 🠖 Bar Pullovers 🠖 Muscle Up 🠖 Front Lever
Inverted Rows vs. Pull-Ups: Which is Better for Back Growth?
While both exercises target the back, they hit different areas. Inverted rows are a great exercise to do especially when you are a beginner starting out and can’t do many pull ups yet, but if you want to maximize your gains and grow a strong back, you should not ignore inverted rows even at higher level. For bodyweigth training, there are not so many pulling and back exercises, so inverted rows will always be relevant.
- Pull-ups primarily focus on “width” by targeting the lats (latissimus dorsi) (the “wings”).
- Inverted Rows focus on “thickness” by targeting the mid-back (traps and rhomboids).
If your goal is a complete, powerful-looking physique, you cannot choose one over the other. The row is actually safer for the shoulder joint and allows for a higher volume of repetitions, which is often better for pure muscle growth.
Fixing Internal Shoulder Rotation During Pulling Exercises
This is the most common mistake in calisthenics, and fixing it will instantly double your results. The problem is the hunch. Many people pull themselves up to the bar by “shrugging” their shoulders forward. This uses the chest and front deltoids to finish the movement, which is the exact opposite of what we want. It puts the shoulder in a compromised position and leads to “impingement” pain.
The fix is scapular retraction.
Before you even bend your elbows to pull, you must perform scapular retraction. Imagine you are trying to pinch a pencil between your shoulder blades. This “opens” the chest and ensures that the traps and rhomboids are doing the work.
In a perfect inverted row, your shoulder blades should be squeezed together at the top of the rep. If your shoulders are rounded forward when your chest touches the bar, the rep doesn’t count!
Horizontal vs. Vertical Pulling
| Feature | Inverted Row (Horizontal) | Pull-Up (Vertical) |
| Primary Target | Mid-Back & Rear Delts | Lats & Biceps |
| Difficulty | Adjustable (Beginner to Pro) | High (Intermediate) |
| Spinal Load | Minimal | High (Decompression) |
| Focus | Thickness & Posture | Width & V-Taper |
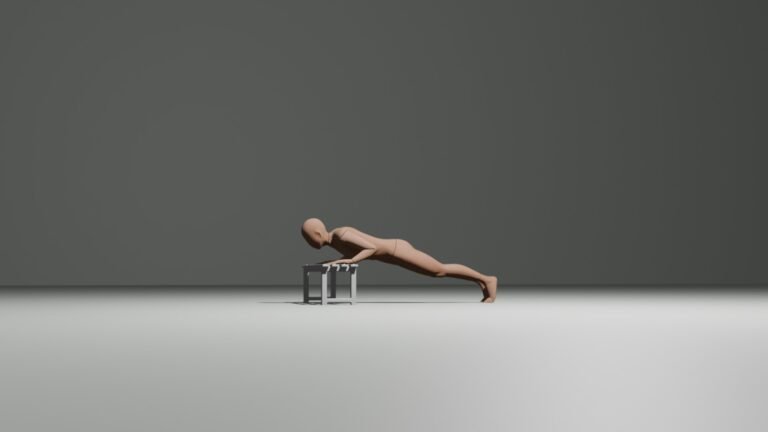
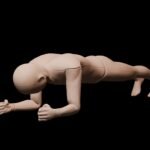
How To Do Inverted Rows – Proper Form and Technique
To the untrained eye, the inverted row looks simple. However, to get the maximum muscle activation, you need to treat it with technical respect.
1. Setup
Find a bar (a smith machine, a squat rack bar, or a low bar at a park). Lie underneath it so the bar is directly over your mid-chest.
2. Grip
Reach up and grab the bar. For a standard row, your hands should be slightly wider than shoulder-width.
3. Body Position
Your body must stay in a perfectly straight line from your head to your heels. Squeeze your glutes and engage your core. If your hips sag toward the floor or your back arches excessively, you lose the mechanical advantage and stop working your back.
4. Pull
Drive your elbows toward the floor behind you and pull yourself up towards the bar. Think about pulling your chest to the bar, not your throat.
5. Peak Contraction
At the top, pause for a split second. Squeeze your shoulder blades together. Your chest should be open, and your shoulders should be down and away from your ears.
Overhand vs. Underhand Grip
Changing your grip can completely shift which muscles are doing the heavy lifting.
- Overhand Grip: This is the “standard” version. It emphasizes the upper back, rear deltoids, and the “thickness” of the traps. It is slightly harder because it takes the biceps out of the equation.
- Underhand Grip: By turning your palms toward you, you put your biceps in a position of power. This variation is great if you want to build bigger arms while still hitting your back, and it’s usually slightly easier for beginners.
- Neutral Grip (Palms Facing Each Other): This is only possible if you are using Rings or a specialized bar. It is the most “joint-friendly” grip and is excellent for those with previous shoulder or wrist injuries.
How to Adjust Difficulty
The beauty of the inverted row is that it is “self-scaling.” You don’t need to add plates to make it heavier; you just need to move your feet.
The Physics of the Angle
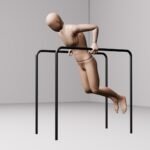
- Vertical (Standing): The more upright your body is, the less gravity you have to fight. If you are a complete beginner, start with the bar at chest height and stand with a slight lean.
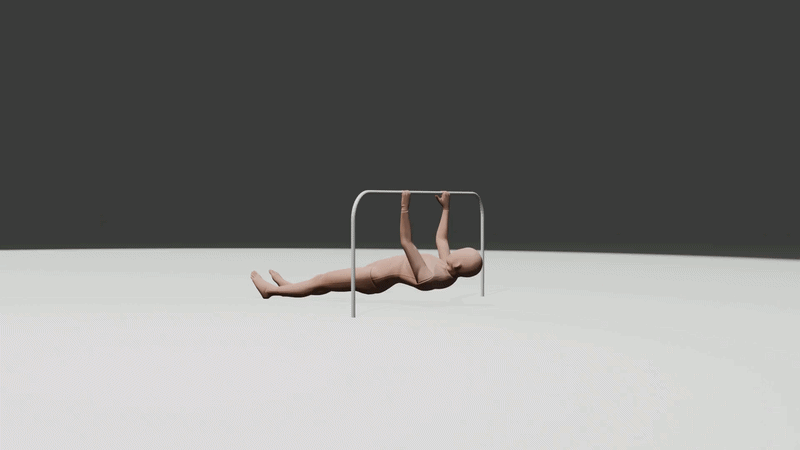
- Horizontal (Parallel): When your body is parallel to the ground, you are pulling a significantly higher percentage of your body weight.
- Feet Elevated: If being horizontal is too easy, place your feet on a bench or a chair. This puts your body in a “deficit” position where your chest is actually lower than your feet at the start, making the pull incredibly heavy.
Common Mistakes That Are Ruining Your Back Gains
Using Momentum: If you have to “kipping” or “jerk” your hips up to reach the bar, the bar is too low. Move it higher and focus on a slow, controlled pull.
Short-Ranging the Rep: Many people stop 2 inches short of the bar. If your chest doesn’t touch (or get very close), you aren’t getting the full contraction of the rhomboids.
Leading with the Chin: Don’t reach with your neck! Keep your chin tucked and your neck neutral. Imagine you have an orange held between your chin and your chest.
“Chicken Wing” Elbows: Letting your elbows flare out at a 90-degree angle can irritate the shoulder joint. Aim for a 45-degree angle relative to your torso.
Rings vs. Bar: Which Should You Use?
If you have the choice, which is better?
- The Bar: Best for building “raw power” and preparing for the Muscle-Up. It forces your body to adapt to a fixed, stable plane.
- Gymnastic Rings: The gold standard for joint health. Rings allow your wrists to rotate naturally into a neutral grip as you pull, which significantly reduces the risk of “Golfer’s Elbow” (medial epicondylitis). Because rings are unstable, they also fire up your stabilizer muscles much more than a bar.
The Inverted Row Progression Ladder
The “magic” of the row is that you can precisely measure your progress. As your body moves from a standing position to a horizontal one, the load increases. Here is the path to mastery:
- Level 1: High Bar Rows (Standing): Stand with a slight lean. This is for absolute beginners to learn how to squeeze the shoulder blades.
- Level 2: Low Bar Rows (Feet on Floor): The standard horizontal row. Your body is parallel to the ground.
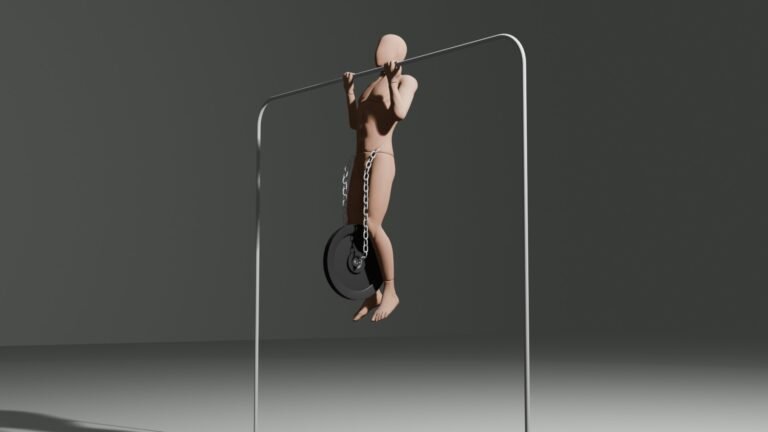
- Level 3: Elevated Feet Rows: Place your feet on a bench or box. This shifts more weight into your hands and mimics the intensity of a weighted row.
- Level 4: Archer Rows: While pulling up, extend one arm out straight to the side. This forces the pulling arm to take about 70-80% of your body weight.
- Level 5: One-Arm Inverted Row: The ultimate horizontal pull. Holding a straight body line while pulling with a single arm requires massive core anti-rotation strength.
The “Bridge” to Elite Skills
Inverted rows are a “gateway” exercise. The strength you build here doesn’t just stay in the row; it “transfers” directly into these three elite calisthenics skills:
1. Pull Ups
Many people struggle with pull-ups because their lower traps and rhomboids are too weak to initiate the move.
- The Transfer: Inverted rows build the “scapular power” needed to pull your shoulders down and back. If you can perform 12-15 clean, horizontal inverted rows, you usually have the foundational strength to unlock your first strict pull-up.
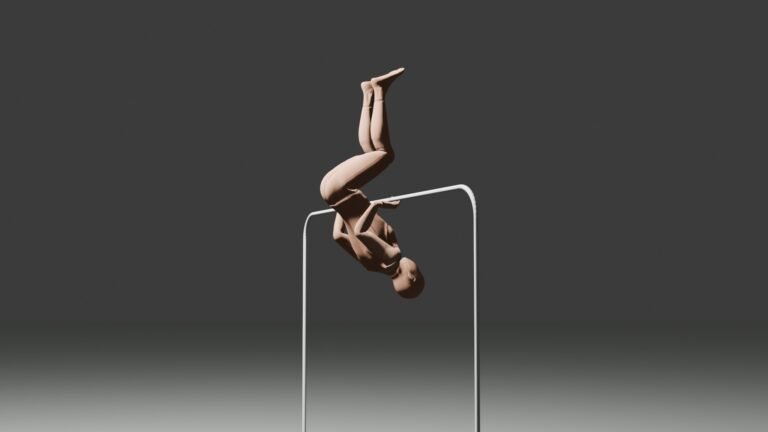
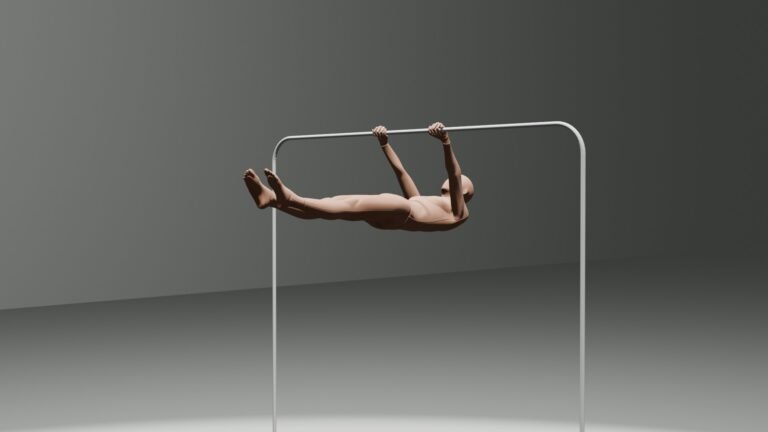
2. Front Lever
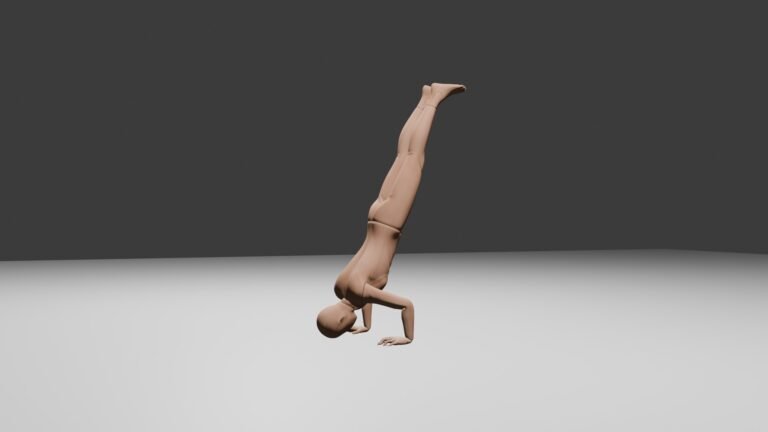
The Front Lever is one of the most coveted skills in calisthenics, but it requires incredible “straight-arm pulling strength.”
- The Transfer: As you progress to Tucked Front Lever Rows (doing a row while hanging upside down with knees to chest), you are training the exact lat engagement needed to hold your body horizontal in the air. The “One-Arm Row” also builds the unilateral lat strength required for the advanced variations of the Lever.
3. Muscle Up
To get over the bar in a muscle-up, you need a high “explosive” pull.
- The Transfer: By performing Explosive Inverted Rows (pulling so hard that your chest slams into the bar and your hands almost lose contact), you are training the “fast-twitch” fibers in your back. This teaches your body how to generate the power needed to transition from a pull-up to a dip.
Programming for Skill Transfer
If you want your row strength to help you with other skills, don’t just “do reps.” You need to change your intent:
- For Pull-Up Strength: Focus on the bottom half of the row. Really emphasize that scapular squeeze.
- For Front Lever Strength: Focus on holding the top position. Pause for 3 seconds when your chest touches the bar. This builds the isometric “clamping” strength of the lats.
- For Muscle-Up Power: Focus on speed. Pull as fast as possible on the way up, and lower slowly on the way down.
Summary of Skill Carryover
| If you want to unlock… | Focus your Inverted Rows on… |
| First Pull-Up | High Volume (10–15 reps) & Scapular Retraction. |
| Front Lever | Pause Reps & Feet-Elevated Variations. |
| Muscle-Up | Explosive “Power” Pulls to the Chest. |
| One-Arm Pull-Up | Archer Rows & Weighted Rows. |
How to Do Inverted Rows at Home
1. The Table Row
Find a sturdy dining table (test it first to make sure it won’t tip!).
- Lie underneath it, grab the edge with an overhand grip, and pull your chest to the table underside.
- Tip: Ensure your grip is secure; if the table edge is slippery, use a pair of gardening gloves or a small towel for better traction.
2. The Towel / Door Row
This is a “life hack” for travelers.
- Take two long towels and tie a knot at one end of each.
- Toss the knots over the top of a sturdy door and close the door toward you so the knots are jammed.
- Lean back holding the towels and perform your rows. This mimics Ring Rows and is incredibly challenging for the grip.
How to Program Inverted Rows into Your Training
To see results, you can’t just do a few sets whenever you feel like it. You need a plan. Here is how to integrate inverted rows based on your specific goals.
Sample 4-Week Progression Plan
| Week | Goal | Sets x Reps | Notes |
| Week 1 | Form Baseline | 3 x 10 | Pick an angle where the last 2 reps are tough. |
| Week 2 | Volume Build | 4 x 10 | Same angle, but add one extra set. |
| Week 3 | Intensity Jump | 4 x 8 | Move feet forward (make the angle more horizontal). |
| Week 4 | Peak Power | 3 x Max | Go for as many clean reps as possible to test progress. |
The inverted row is the “glue” that holds a good physique together. It builds the posture, the thickness, and the foundational strength that makes advanced calisthenics possible. Whether you’re doing them under a park bench or on professional rings, stay consistent, keep your body “rigid as a board,” and never skip your scapular squeeze!
Improve Your Results With Proper Training
If you’re doing inverted rows as part of your training, make sure you’re also focusing on proper form, progression, and consistency.
Most beginners struggle not because the exercise is bad, but because they’re missing the basics. If you are just starting out and looking to learn the basics of bodyweight training without equipment, this Beginner No Equipment Bodyweight Training Guide will get your started easily and you will make your workouts so much better and see result in no time!
Once you have the basics down, you can try this very simple Beginner Bodyweight Workout Plan to stay on track until you want to move onto some more advanced exercises.
If you are struggling with bad form, injuries or lack of motivation, you can also check these: